Sunday 8 December 2013

So much to do, so little time.

When I'm able, I've been making stuff for Chritmas, which seems to be coming along faster that it should be! Consequently, I've not had much time to blog. 

I can't post pictures of some things as they're presents for people who read my blog, but here are some pictures of what I can show you.

A get well card for my sister.


Rose sachet

Mobile phone cover
 
 A collage/picture.


Christmas cards.


TTFN
Louise.

Thursday 21 November 2013

Craftfest blog tour - a little bit of red.

A big welcome to my fellow Craftfest blog tourists. I hope you are all enjoying Craftfest and its tour to the blogs of some of its stall holders.

My blog tour post is about redwork, I hope you like.

Red is a hugely popular colour at christmas - Father christmas doesn't look right in any other colour - so a lot of redwork you see these days is christmas orientated.

A little bit of history.
One of the reasons that redwork embroidery became popular was its use of a wonderful deep red thread called Turkey Red. This was because, unlike most other colours, it was colour fast.
Although the popularity of redwork embroidery peaked around the turn of the century it wasn't new. Redworked usually consisted of  outlined pictures that were stitched with a simple stem stitch. A stitch that was easy for children to learn.


Redwork items included embroidered tidies were used to protect chair backs while embroidered splashers were hung behind the sink. Napkins, tea towels, dresser scarves, chair cushions, sofa pillows were all opportunities for stitching with red floss.

The popularity of redwork wained when other colours became as colour fast so that multi-coloured items could be created or created in another single colour such as blue.

However, there are still many people, like myself, who enjoy working with red thread. As well as the outlined pictures I also enjoy doing redwork cross-stitch. Both can be done easily by children interested in sewing too.

There are many redwork patterns available on websites, including Pinterest (you can see my redwork board on there) which you can use to create your own piece of red embroidery. But you can also design your own pattern too. For outlined pictures you just need to draw what you'd like to embroider. For cross-stitch you need to do a little more work, but it is very easy to do. You just need some graph or other squared type of paper.

In my example, below, I have used graph paper that has quite small squares, however, if you have large squared paper, a child should be able create their own design easily.


For this kind of work is usually done on an even weave fabric or aida. If it's the first time you've done this, I'd use aida with a small number of squares per inch, between 7 and 12, with 7 being the easiest for a child to use for the first time (it's what I started on at school).

One square on the paper equals one square on the aida. For the purpose of this post I decided to create a cross stitch christmas tree.


First of all I marked a triangle on the graph (see picture above), I then used this as a guide to create a solid tree. Where the line of the triangle intercepted a square that became one square, so that the sides of the tree turned into steps rather than a slope.


The two triangles in the middle show (of the first picture) a different way to use the triangle to create a single line tree and a different sized triangle.

I decided to do the single line-type tree with the word Noel underneath on aida.


To make it easier to transfer the pattern from paper to fabric you need to find the centre of your design. To do this you need to count the number of squares in the width and the length. Then draw a line at the halfway point on the width and the left, where the lines intersect that's the centre (see the picture above). To find the centre of the fabric fold it in half then into quarters. Again, the centre is where the two lines intersect.


Start at the centre point and to ensure that the cross-stitch looks neat make sure you sew the cross the same way each time.

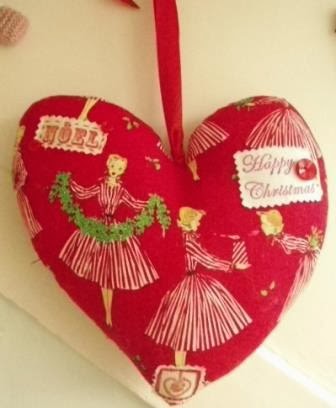
I made the decoration by cutting out a circle of the aida, ensuring the cross-stitch was in the centre of the circle and another circle out of a piece of fabric.  Putting right sides together, I sewed the two pieces of fabric together and left a gap so that I could turn it the right way out. I added a small amount of stuffing to the inside of the decoration and then sewed up the gap using a slip stitch. I attached a piece of lace to the top of the decoration so that it could be hung up.


This was just a small item to make with redwork, once you have mastered your stitches, you could make anything you like.

If red isn't your thing, you could use any colour you like to create something unique to you (such as my version in white below).


Pop over to Craftfest to do a bit of shopping at the Christmas fair from the comfort of your home. There are plenty of lovely items available.

TTFN
Louise

As well as having stall at Craftfest, you can find Elsie May and Bertha goodies on our website www.elsiemayandbertha.co.uk

Sunday 17 November 2013

Scaffolding, Christmas decorations and Craftfest.

The back and side of our house is currently covered in scaffolding. 


Our house is too old to have cavity walls so the only way to insulate the walls is on the outside or the inside. It would take up too much space to have the insides done so we're having the outsides done along the side and back of the house (we're semi-detached), hence the scaffolding. 


 The front of our house is mostly windows so we're having that insulated on the inside. We'll just lose a bit of space in our bedroom and front room.


The cats think they've been given a new walkway in the  sky. Fortunately, they can't get onto the  upper level of the scaffolding, otherwise they'd be on the roof! They won't think it's so good when the workmen are on it though!

Christmas decorations.


Most of my making recently, probably like everyone else, has involved christmas decorations. I'm  using a lot of images from vintage christmas cards and decorating with vintage lace, buttons and beads. 


Craftfest.

Creative Connections

If you fancy a bit of shopping over the next week and like to buy handmade, pop over to Craftfest, an online Christmas fair featuring a huge selection of beautiful things. Elsie May and Bertha has a stall too.

Blog hops.

Pop over to Handmade Monday to see what's been going on over there.

I share with other blog parties, you can find links to them in the right-hand-side column. It's a great way to share what you've done and meet lots of other like minded people.

TTFN
Louise


Thursday 7 November 2013

Mrs Tinne's Wardrobe

As I mentioned a couple of weeks ago, I'd recently visited the Walker Art Gallery to see their updated exhibition of  Mrs Tinne's Wardrobe (the previous exhibition that I saw was in 2006), showing a selection of the clothes in her wardrobe.

Emily Tinne. This photo was possibly taken on her honeymoon 1910
A bit of history.

Before she married, Mrs Tinne was Emily Margaret McCulloch. Her father was a Presbyterian minister and was a the principal of a theological college in West Bengal when Emily was born in 1886. She was sent to boarding school in England, along with her brothers and sister, when she was seven and summers were spent at their Aunt's in Edinburgh. Their parents didn't return to the UK until the 1920s.

When she was eighteen, Emily trained to be a domestic science teacher. When her studies were complete, Emily and her Aunt moved to Liverpool to live with her Uncle (and her Aunt's brother). Her first job was as a domestic science at the Liverpool Training School of Technical College of Domestic Science. It was during this time that she met Dr. Philip Tinne, a local GP. They became engaged in 1909 and married on 14 July 1910. When they were married they lived in Oak Cottage, at 6 The Serpentine, off Aigburth Road until 1923 and then moved to Clayton Lodge, 32 Aigburth Road, where they lived for the remainder of their lives.
Dinner dress, silk velvet devore abt 1932-4
The collection.

Eveningdress, silk satin backed crepe and silk crepe 1935-6
The Tinne collection has over 700 items and it is unusual to have such a lot of items from a single family.

Evening coat, silk velvet and Angora rabbit 1930-6. The silk velvet on this coat is so beautiful in the flesh.


Emily could only create her collection of clothes as her husband had large private means as well as his work as a doctor, though the large amount of clothes, underwear, shoes and hats that she bought were the cause of some tension between Emily and her husband. Many of her clothes were bought from Liverpool's department stores, including Owen and Owen, George Henry Lees (now John Lewis'), Bon Marche and Lewis'.

Evening dress, silk velvet devore about 1932-34 This a typical 1930s dress, with a revealing low cut back with arms uncovered. It is doubtful whether Emily would have had an occasion, or her husband's approval to wear such a daring dress.

Some of the clothes in the collection still have their shop labels in them and others show hardly any wear. As well as a love of clothes etc. Alexine, Emily's  daughter, thinks that she may have bought some of her collection to provide the poorly paid shop assistants with some commission during the Depression.

I've used Pauline Rushton's book on Mrs Tinne's Wardrobe to write the above. There is a lot more information on the Tinne family, the shops in Liverpool, photographs and a complete list of the full collection in the book, which you can buy from the Gallery.
Day dress, machine knitted rayon jersey and silk abt. 1914-6

The pictures in this post, except the portrait of Emily (c National Museums Liverpool) are taken by me. 

Shoes, abt 1923-6. You can't really tell from this picture, but these shoes are really narrow. Emily must have had petite feet.

Cloche hat made from dyed straw 1928-31. I could easily wear this summer hat now (if it would fit on my big head.

If you can, pop into the Walker Art Gallery to see the items from Mrs Tinne's wardrobe on display. If you can't, there are more pictures of the collection and about Mrs Tinne on the Walker Art Gallery website.


Monday 4 November 2013

Birthday presents, a bit of cross-stitch, and a few of my Christmas decorations.

As I mentioned last week, it was my birthday last Saturday, which was spent quietly doing not a lot. My 'official' birthday (like the Queen!) was on Sunday, when my Mum and Dad and my sister and her husband came for dinner, and to bring me presents! I was very fortunate with my presents!
From my Mum and Dad, a jumper, a mini journal, a beautiful cup and saucer, rose and violet creams and a fabulous tin with embossed roses on it.
I'm going to use the journal (it's only 9cm tall and has an Alfonse Mucha cover) for a 'page a day' thing that I am going to start in the new year. I'm not sure what the theme, if any, this will be about yet.


The chocolates, rose and violet creams, are my Sunday morning in bed with a cup of coffee and reading a book treat .


The tin has become my patchwork box. I've added some fabric paper and lace to decorate the inside and made a little pincushion from an old embroidered tablecloth and some pom pom trim.
The inside of my patchwork tin.
My other presents were from my sister and her husband. Staedler coloured pencils and pens, which'll come in useful for drawing and collages.

Sophie Long's book, Mastering the Art of  Embroidery. This is full of every type of embroidery you can think of. I'll be using it to increase my embroidery skills.

Goldwork (c.Sophie Long)

Silk embroidery thread
Crewel work (c. Sophie Long)


Hand-dyed silk embroidery threads (third picture above) that are going to be beautiful to use.


I've been doing a bit of cross-stitch, something I've not done for ages, so I'm just doing a few small pieces for Christmas decorations to get back into the swing of things.


I've also been making some fabric panel decorations featuring robins, wrens and holly and ivy (it's been quite a productive week for me!). 

The finished decorations pictured in this post will be added to my website this week, but I've already added Christmas cards and other decorations to my Christmas page for you to choose from now. 

To celebrate my productive week, I'm offering my online friends 20% off anything on my website until the end of next Sunday (10th Nov). Just quote the code earlyxmas at the checkout. 

Pop over to www.elsiemayandbertha.co.uk  to start your handmade Christmas.

TTFN
Louise

P.S. My blogpost on  Mrs Tinne's Wardrobe (see last week's post) will be published on Thursday.

P.P.S. Pop over to Handmade Monday to see what other bloggers have been up to since last week.


Friday 25 October 2013

Christmas decorations, popping into an art gallery and a fabulous lunch.

We went to Liverpool yesterday (Thursday) it's my birthday on Saturday and my other half wanted to take me out for lunch. The reason we went yesterday, rather than today or tomorrow, was because it was supposed to be the best day of the week as it was due to bucket it down today (instead the sun is cracking the flags!) and on Saturday. That's British weather for you!

Anyway, here's what we did. We had coffee and toast at John Lewis' and also spent a happy time looking around the Christmas decoration department. The shop also had its decorations up, which are quite lovely, but it's not even bonfire night yet! It's too early!!

They always have fabulous decorations for sale at John Lewis' and this year is no different. I do make my own, but I do have a weakness for shop bought ones too.

There's folksy ones.


 Vintage-style ones. These are my favourites, using glass, pink and silver.


Knit covered reindeer heads.
 

 This Christmas tree with the icicles is beautiful.


These two are in, what I call, a dirty blue colour. They wouldn't fit into my decorating schemes, but in the right place they'd be chic.


Primary colours, again, not really me, but they'd look great in a modern flat or a child's room. I do like the paper concertina shapes though.


Felt angels.


After the Christmas decoration gazing, we popped over to the Walker Art Gallery. A few years ago they had an exhibition of clothes from the wardrobe of a Mrs Tinne, the wife of a quite well to do doctor. Since then, the remaining pieces of the collection were donated to the gallery by one of Mrs Tinne's daughters and items not previously seen have been put on display. I took lots of photos of the garments, shoes and hats so I'm going to write a separate blog post on these next week. For now, here's pictures of the good lady, probably taken during here honeymoon, a little about the collection and a peek at one of her evening coats (apologies for the reflections in the last photo).


When we left the gallery, the sun was shining directly behind the Steble Fountain, which is at the top of William Brown Street, making it all twinkly so I just had to take a picture.


Lunch was to be had at one of our favourite restaurants in Liverpool, the Italian Club. This time we both decided to have their steak sandwich. It was a great choice. The steak was cooked superbly (medium for me, rare for Ray), and came on a panini, with cooked onions, lettuce, tomato and mustard. This piece of gastronomic delight (I think I'm getting a bit carried away here, but it really was that good!) was accompanied by french fries and salad. You should go to the Italian Club (or their sister restaurant Italian Club Fish, which is equally as good), all of their dishes are authentic Italian and are served with the Italian love of food and sharing.

We ended the trip on this heavenly note (sorry!) and caught the bus home.

I have done some making over the past couple of weeks, but most of it is for commissions so I can't share pictures until they've seen the finished articles. It's mainly included embroidering and embellishing (fun bits), with just a little work on the sewing machine.

I have spent a bit of time adding things (not much fun bits) to my own website and onto my new outlet Crafty Magpie too.

Hope you have a great weekend.
TTFN

Louise